Auxiliary Section Removal and Disassembly – In Chassis
Special Instructions
The following procedure covers the removal and disassembly of the Auxiliary section with the transmission remaining in the chassis. If the transmission is removed from the truck refer to the “Auxiliary Section Removal (Bench Procedure)” in this section.
Special Tools
None
Component Identification
 |
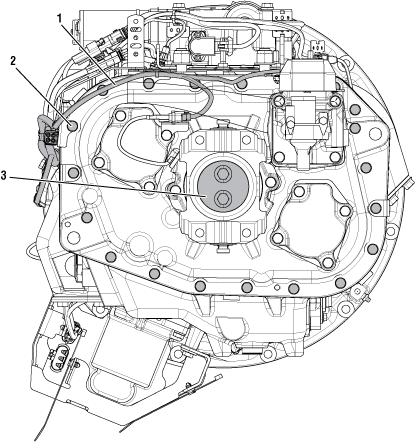
1. Wiring Harness 2. Auxiliary Case Bolts (x19) 3. Auxiliary Main Shaft Retaining Flange and Yoke |
In Chassis
Drain the oil.
Disconnect the OEM supplied air line. (Refer to Air Line disconnection for the procedure.)
Disconnect the driveline a move out of the way.
Disconnect the Wiring Harness from the Range Solenoid Valve and speed sensor.
If any OEM equipment needs to be removed refer to the OEM for guidelines.
Remove the 19 bolts securing the Auxiliary Section to the Transmission.
Put the removal jack in place and secure to the Auxiliary Section.
Slowly remove the Auxiliary Section from the Main Case and the dowel pins.
Once the Auxiliary Section is on the bench, go to Auxiliary Section Removal and Disassembly.