Transmission Shift Complaint
Overview
This symptom-driven test is performed if a shift complaint exists and there are no fault codes.
Detection
- Transmission may exhibit slow or harsh launch from a stop.
- Transmission may not be able to complete a shift.
- Transmission may exhibit slow or harsh shifting.
Possible Causes
- Vehicle
- Varies
- Engine
- Varies
- Transmission
- Varies
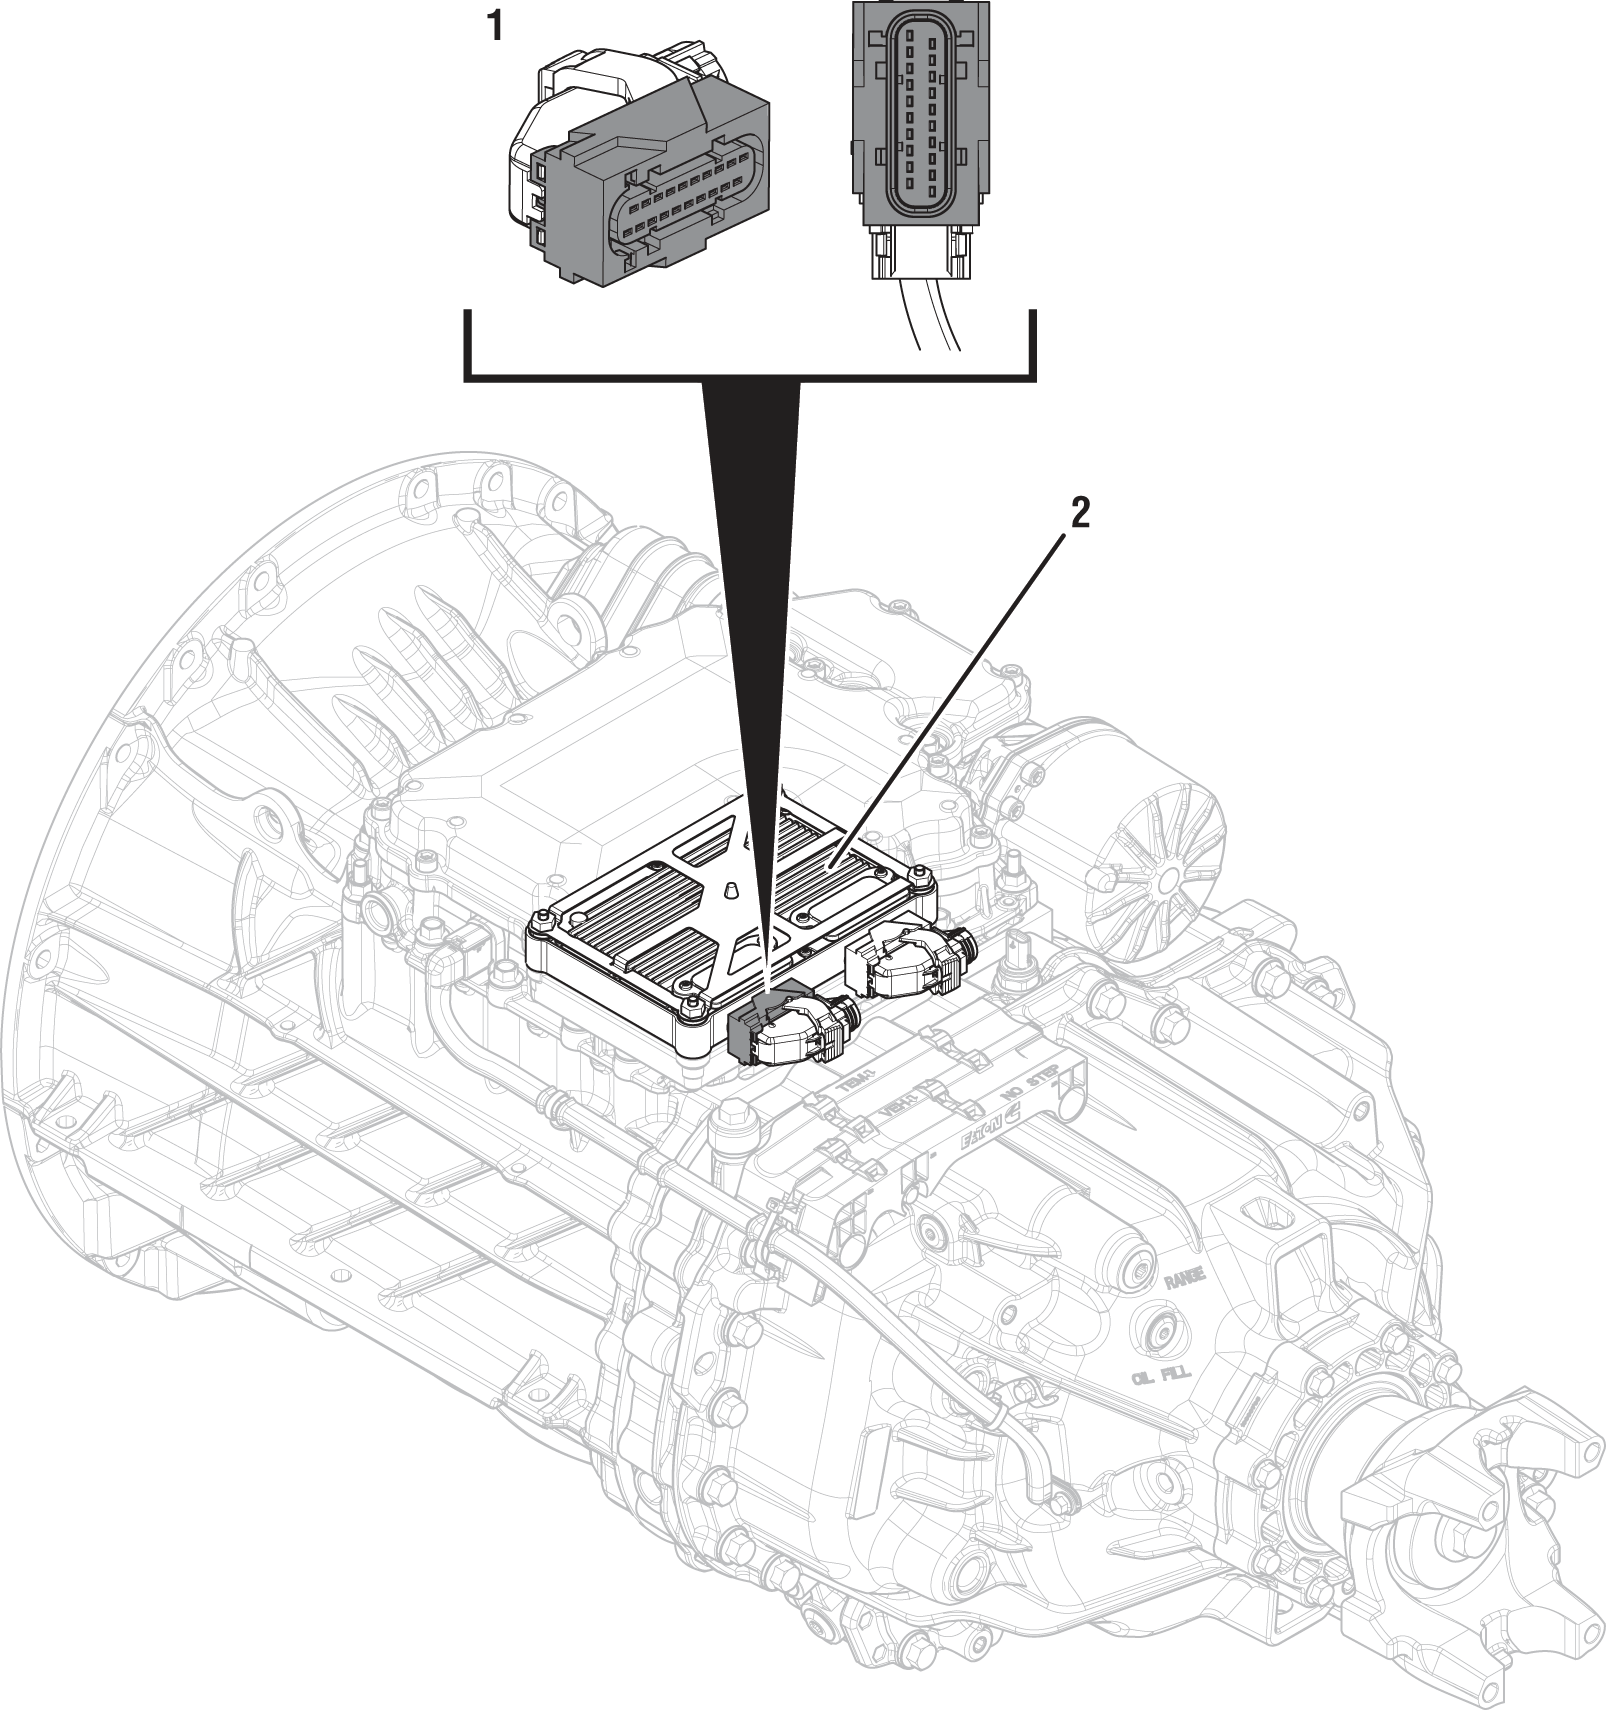
Component Identification
 |
1. 20-Way TCM Vehicle Harness Connector 2. Transmission Control Module (TCM) |
Transmission Shift Complaint Test
Document the vehicle symptoms by completing the Driver Questionnaire on Driver Questionnaire Overview.
Set vehicle parking brake and chock wheels.
Key on with engine off.
Connect ServiceRanger.
Select “Service Activity Report”.
Enter information and select “Start Report”.
Note: Fault code and transmission information is downloaded into the report.
Select “Send to Eaton”.
Note: Internet connection is required.
Retrieve and record the transmission fault codes and FMIs, and their occurrences and timestamps.
Note: To ensure a successful Driver Triggered Snapshot, refer to RRMT-0044: Driver Triggered Snapshot - Transmission Shift Complaint without Active Transmission Fault Codes Procedure.
If a vehicle/engine fault code(s) is Active, contact OEM for further diagnostic instructions.
If a transmission fault code(s) is Active, Go to Step D
If a transmission fault code is not set, Go to Step B
Drive or operate the vehicle (road test) and attempt to duplicate the vehicle symptom under the conditions reported in the Driver Questionnaire.
If the vehicle symptom is duplicated, capture a driver triggered snapshot of the event by using the Transmission Driver Interface Device and performing the sequence below:
- Select “upshift”, “downshift”, “upshift”, “downshift” (upshift, downshift, upshift, downshift) within 1.5 seconds.
Note: Recording the driver triggered snapshot is time sensitive; for the best results, perform this sequence immediately after the symptom occurs.
The display indicates “ST” and the vehicle may set a tone when a snapshot is recorded.

If the symptom was duplicated and the display indicated “ST” and/or “F”, Go to Step C
If the symptom was not duplicated, no problem was found. Contact Eaton Cummins Automated Transmission Technologies at 1-800-826-HELP (4357) for further diagnostic instructions.
Set vehicle parking brake and chock wheels.
Key off and allow the TCM to perform a complete power down.
Key on.
Connect ServiceRanger.
Select “Service Activity Report”.
Enter information and select “Start Report”.
Note: Fault code and transmission information is downloaded into the report.
Select “Send to Eaton”.
Note: Internet connection is required.
Retrieve and record the transmission fault codes and FMIs and their occurrences and timestamps.
If a vehicle/engine fault code(s) set during the road test, contact OEM for further diagnostic instructions.
If a transmission fault code(s) set during the road test, Go to Step D
If a fault code did not set and the symptom was duplicated during the road test, contact Eaton Cummins Automated Transmission Technologies at 1-800-826-HELP (4357) for further diagnostic instructions.
Determine the fault code to troubleshoot first by using the priority index below (with 1 highest priority and 4 least priority).
- Priority 1: Vehicle Interface Fault Codes 100-199
- Priority 2: Component Fault Codes 200-499
- Priority 3: System Fault Codes 500-899
- Priority 4: Feature Fault Codes 900-999
Go to the Fault Code Isolation Procedure Index and troubleshoot the fault code with the highest priority level.
If more than one fault code within a level applies, troubleshoot Active fault codes before Inactive fault codes.
If only Inactive fault codes are present, troubleshoot the fault code that has the highest occurrence count or most recent time stamp.
If no fault codes are found, match the vehicle symptom to the appropriate item in the Symptom-Driven Diagnostics Index